
How to Search Text Inside Screenshots on Mac
Find a saved screenshot by the words inside it. Use Live Text to copy text from an open image, or Cliptop to search image clips later.

You remember the error message in a screenshot, but not the filename or the day you took it. To find that image by its words, you need a tool that reads the text and includes it in search.
Cliptop can do this for saved image clips. Enable Recognize text in images, copy a screenshot to the clipboard, and search for a word from the image. The text recognition runs on your Mac.
If you already have the image open and only need to copy a sentence, start with Apple’s built-in Live Text.
Copy text from an open screenshot with Live Text
- Open the screenshot in Preview.
- Move the pointer over the text and drag to select the words you need.
- Control-click the selection and choose Copy Text.
- Paste the text into your document or message.
If you cannot select text, try Tools → Text Selection. Apple’s Live Text guide for Preview explains the controls and language limits.
Live Text works well for an image you have already found. The next steps cover a different task: keeping copied screenshots in a library so you can find them later by their content.
Make screenshot text searchable in Cliptop
OCR means optical character recognition. It reads the letters in an image and converts them to text. Cliptop keeps that text with the image clip, so a search can find words that never appeared in the filename.
1. Turn on image text recognition
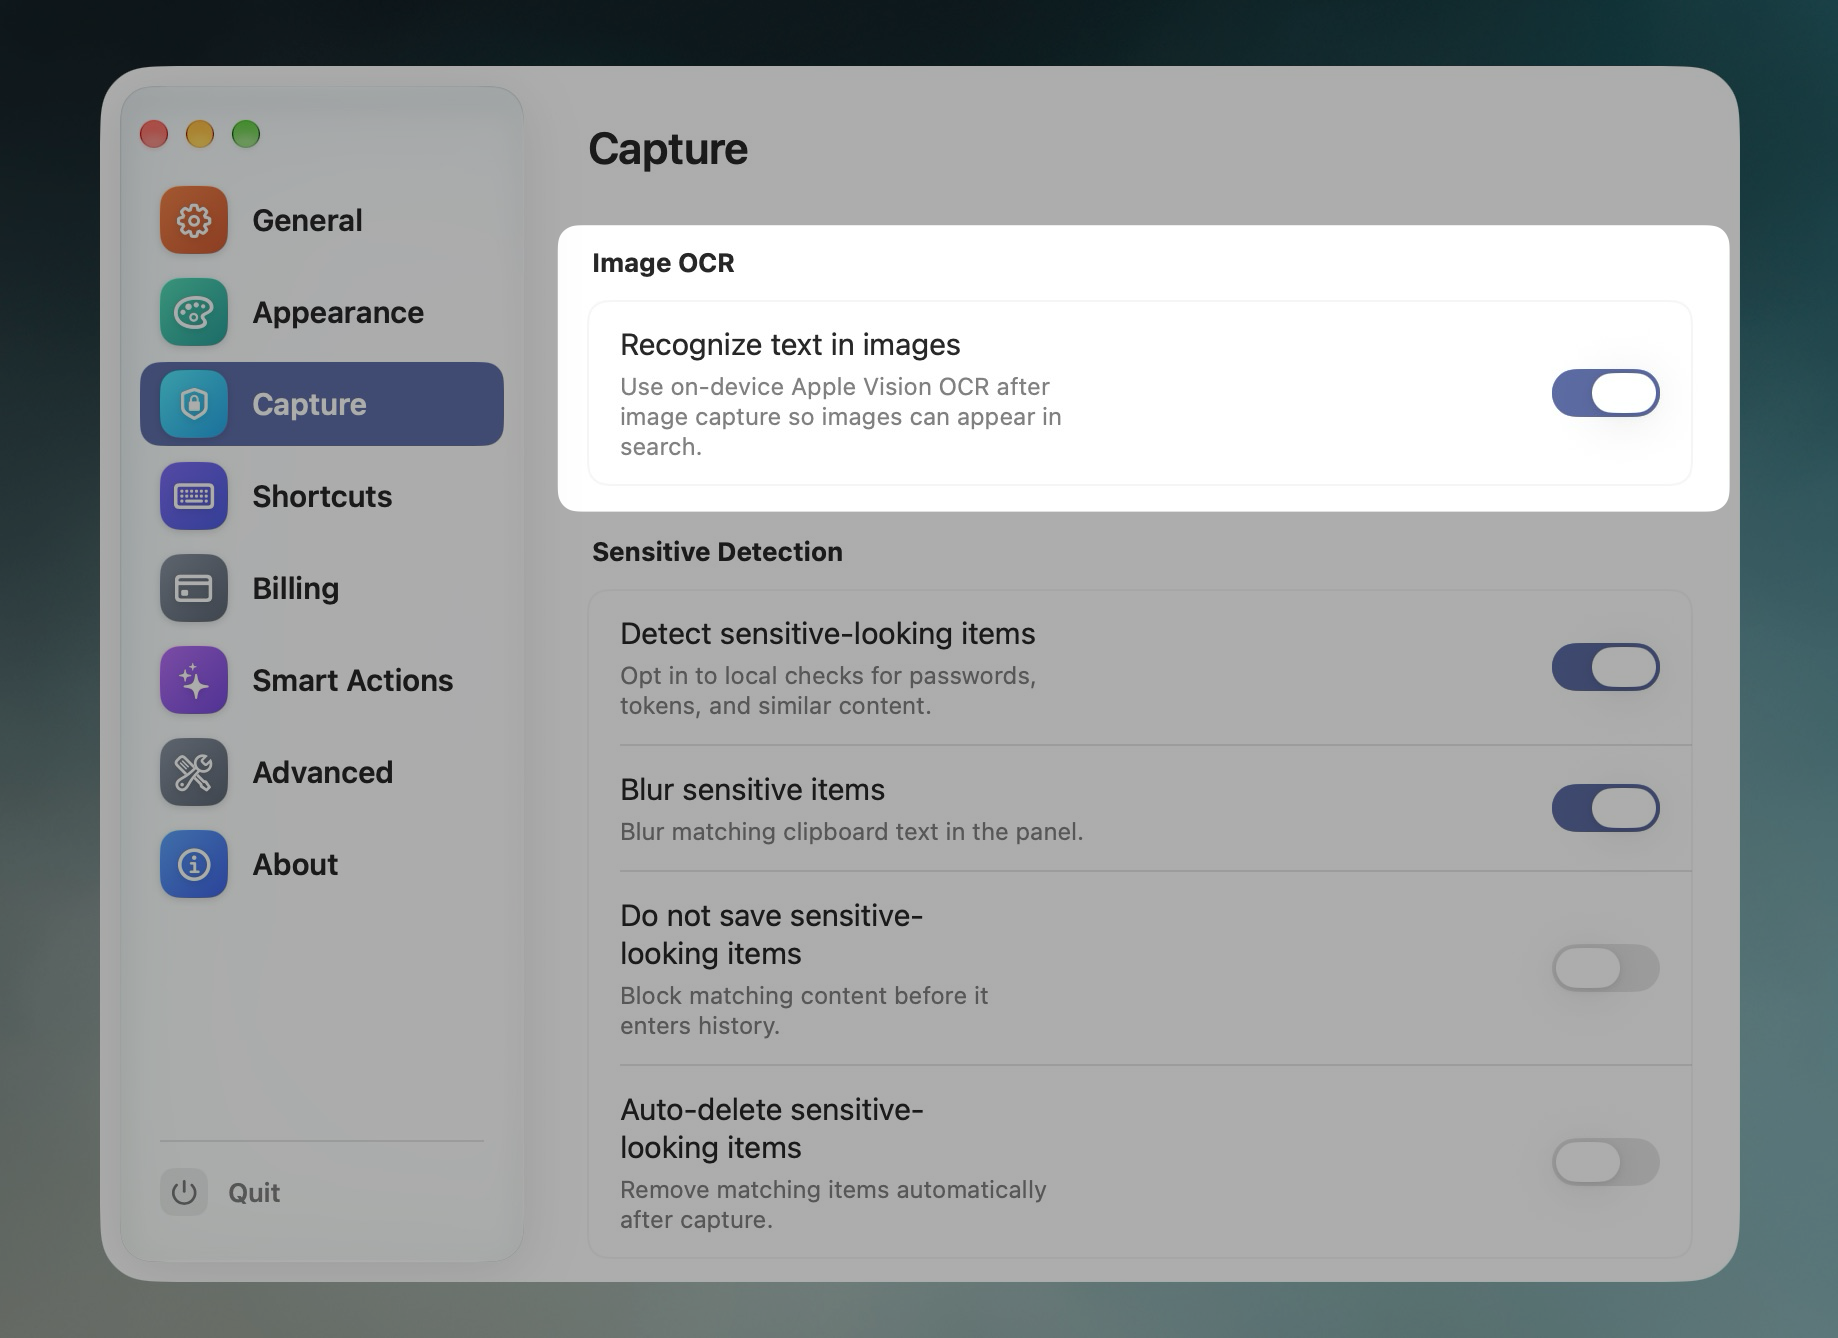
Open Cliptop’s Settings → Capture. In Image OCR, turn on Recognize text in images.
This setting runs recognition after image capture. For an older clip, select the image and use Recognize Text from its actions. You do not need to assume that enabling the setting will process all your older images.
2. Copy the screenshot as an image
With Cliptop running and capture active, press Control-Shift-Command-4. Drag to select the part of the screen you want to keep.
The Control key sends the screenshot to the clipboard. Without it, the normal screenshot shortcut saves a file instead. Apple documents both methods in its Mac screenshot guide.
To add an existing screenshot, open it in Preview, select the image with Command-A, then copy with Command-C. Make sure you select the image rather than a passage of Live Text. Copying the file in Finder is a file-copy action; this guide uses an image clip.
3. Search for a word from the screenshot
Open Cliptop with Shift-Command-V, or your chosen shortcut. Allow recognition to complete, then search for a distinctive word visible in the screenshot.
For a simple test, type this line in a temporary note:
Project review: cobalt prototype, Friday at 10:30.
Capture that line with Control-Shift-Command-4. Copy another item, then open Cliptop and search for cobalt. The screenshot should appear once its text has been recognized, even if its filename does not contain that word.
Use an unusual word for this test so the result is easy to identify. This is a repeatable example, not a promise that every image will produce perfect text.
4. Copy the text or reuse the image
Select the screenshot and choose Copy OCR Text from its actions. Paste the result into a note, issue report, or document.
In the image preview, you can also switch to OCR Text, use Recognize to run recognition, and choose Copy OCR. If you need the picture rather than its text, copy the image clip normally.
Watch the OCR text copy demonstration.
The recording shows screenshot text copied into Notes. To repeat the text-copy step, select an image clip, choose Copy OCR Text, then paste into your document.
What this workflow can and cannot find
| Task | What to use |
|---|---|
| Copy text from an image that is already open | Live Text in Preview. |
| Find a screenshot saved as a Cliptop image clip | Cliptop search after text recognition. |
| Find a screenshot that was never saved in Cliptop | Find or open the original file first, then copy its image into Cliptop if you want to keep it. |
| Find a clip after it has been deleted | Return to the original source. OCR does not restore deleted clips. |
Cliptop does not scan every image in Desktop, Downloads, or Photos. It works with the images saved in its own history and Pinboards. Keep images you need repeatedly in a Pinboard, and check your history retention settings.
For general history search, read how to see clipboard history on Mac.
If a screenshot does not appear in search
First, confirm that the image appears in Cliptop. If it is missing, check that capture is active and that you copied image content rather than only saving a file.
If the image is present, open its preview and check OCR Text. Run Recognize if the text is missing. Search for a short, clear word rather than the whole sentence.
Small text, low contrast, handwriting, unusual fonts, and compressed images can reduce recognition quality. Try a new capture with larger text and less surrounding content. Check copied numbers, code, and punctuation against the image before using them.
Locked clips also need attention: Cliptop does not run image recognition on a locked clip. Unlock it before trying recognition.
Keep screenshot text private
Cliptop uses Apple Vision for text recognition on your Mac. This OCR step does not require uploading the image. Optional iCloud Sync is separate and can sync saved clips through your private iCloud database.
The recognized text becomes part of the clip’s searchable content. Treat a screenshot of private information with the same care as copied text. Review Cliptop’s capture and storage controls in Is Clipboard History Safe?.
Try it with one screenshot
Download Cliptop for Mac, enable image text recognition, and try the cobalt example above. Then use the same steps for an error message or design reference you need to find again.
See the Mac clipboard manager overview for history, Pinboards, and the other ways to reuse copied work.
 Download Cliptop for Mac